How to create a realistic shadow in 9 steps using Photoshop
This tutorial will show you step-by-step how to create a realistic-looking drop shadow using Adobe Photoshop. This technique works best for round objects and requires a little more work for any irregular in shape objects. I might do another tutorial on that, but if you get the basics of how this technique works, then I'm sure you will be able to figure out the rest. By the way, this exact technique was used for all the shoes that you see on ShoeGuru.
Step 1: Open the file
Find a photo of something round, like a soccer ball, for example. Save the image to your computer and open it up in Photoshop.
Step 2: Select the ball
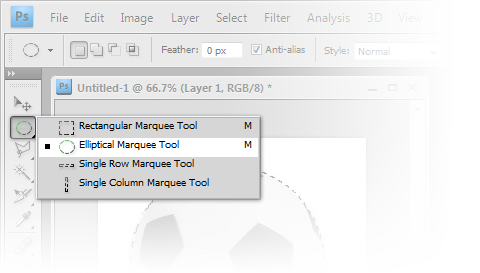 Using an Elliptical Marquee Tool, select the ball. You can constrain your selection by holding down the Shift key on your keyboard (this will make your Elliptical Marquee Tool a perfect circle).
Tip: You can "cycle through" all the selection tools by pressing Shift + M.
Step 3: Send the selected object to a new layer
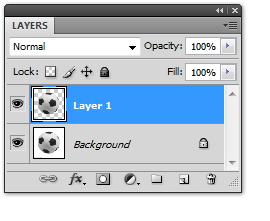 After selecting the ball, press Ctrl + J (or do it the long way by going to: Layer > New > Layer via Copy). This will throw anything selected (ball in this case) up to a new layer. De-select the object (Ctrl + D).
Step 4: Fill the background with a solid color (white)
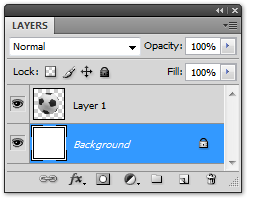 Select your Background layer and fill it with White (or any other color that's not too dark). There are several ways of doing this: first, make sure that your background and foreground colors in Photoshop are set to their default values – press D on your keyboard to revert colors to the default white and black values. Now press Ctrl + Delete. If you were on a Background layer, it should now be filled with white color, if it's not, something has gone terribly wrong…
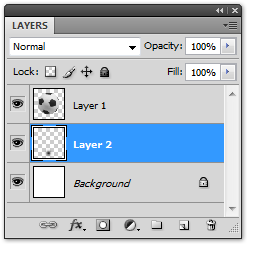
Step 5: Using the Brush Tool, create a "shadow" on a new layer (between the object and the Background layer)
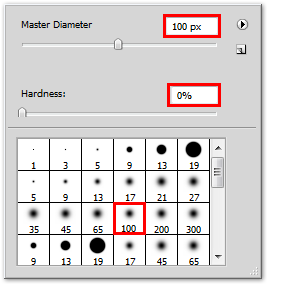 Select the Brush Tool by pressing B (
 ![]() for brush) on your keyboard. Set the Master Diameter to ~100px and Hardness to 0%.
for brush) on your keyboard. Set the Master Diameter to ~100px and Hardness to 0%.
Tip: right click your mouse anywhere inside of your work area to get brush options.
Step 6: Stretch out your newly created "shadow" horizontally and lower the opacity to ~60%
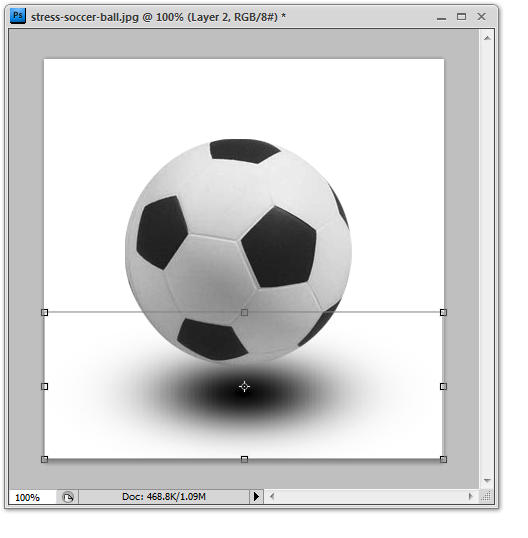 Make sure that the "shadow" layer is selected. Press Ctrl + T to activate the Transform Tool (I won't give the optional "long way" of getting to these functions for 2 reasons: 1). I am lazy and 2). you should use shortcuts - they make your life easier and less wasteful).
Try to get something similar to what you see in the example image. Press Enter to finalize your transformation and press 6 (you can change opacity by pressing 1 through 0 on your keyboard, while having the Move Tool enabled) to lower the Opacity of the 1st shadow that you just finished transforming to 60% (this will depend on how dark you chose your Background to be; the darker it is the higher the percentage will be, otherwise you won't see anything).
You might also consider making the ball a little smaller, depending on what image you chose – I will make mine a little smaller in this case.
Step 7: Create a second 50% smaller shadow in a new layer and transform it accordingly
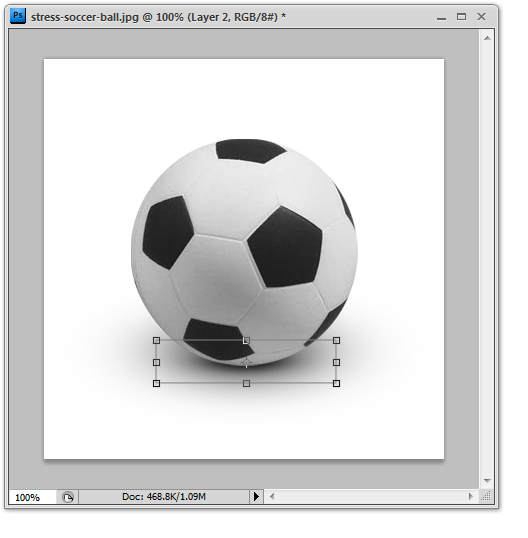 Select a 50px Master Diameter of the Brush Tool and in a new layer create a second, smaller "shadow". You will leave this one at 100% Opacity.
Step 8: Positioning (a little bit of theory/explanation)
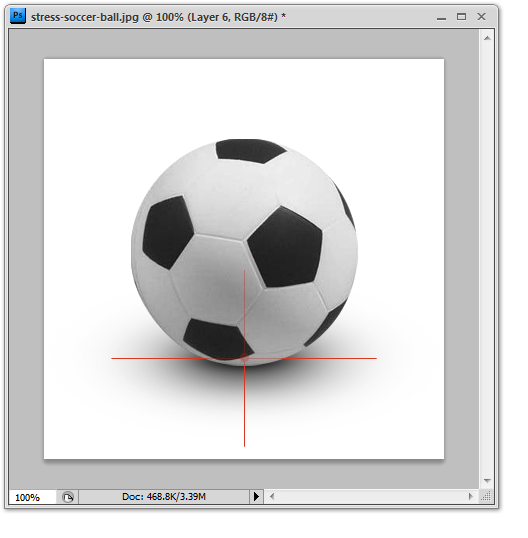 Now, this step will greatly depend on the angle of the light source and your relative position to it, but for the sake of this tutorial, let's pretend that we are using a single defused light source, positioned directly above the object. These always create a very nice, soft shadow, and are frequently used in commercial product photography.
In this case, the centers of both shadows will align in the middle. Once you have aligned them (you can select multiple layers by holding down the Ctrl key, clicking on the layers you want selected and then selecting the alignment option from a menu that looks like this: ![]()
Since you can't see where the ball touches the ground in this example, both shadows will need to be moved up a little bit, as most shadows happen where the object actually touches the surface. Check the above image if you have no idea what I'm talking about. The red dot is where the object touches the surface (approximately) and where the centers of both shadows should be aligned.
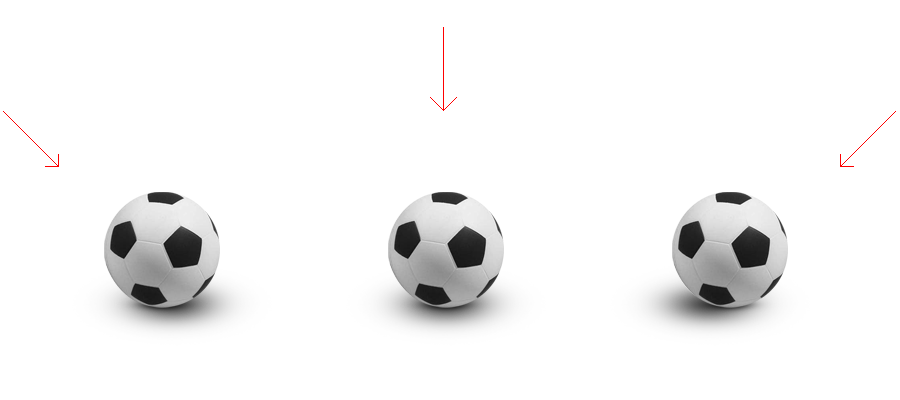
The following examples will show you how the shadows should be positioned in different lighting situations. If the light source is located on the left side, the the bigger (softer) shadow will always be on the opposite side and vise-versa.
Step 9: Saving the final image as a PNG (optional step)
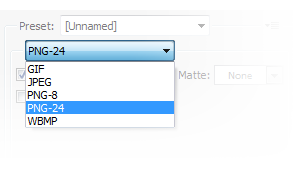 Since you have cropped (isolated) your object and have shadows that contain transparency, a good idea would be to save it without the white background, so the final image could be used on virtually any background color. Click on the little "eye" icon right beside your main Background layer. This will hide that specific layer. Now press Ctrl + Alt + Shift + S (aka Save for Web). This will bring up a window with a preview of what your final output will look like. Change the file format to PNG-24 (PNG with Alpha Channel support) and click Save. You are done!
Download PSD (135kb)
Enjoyed what you saw? Stay updated by following me.