Century Bookstore build
Got this Mayberry Street Miniatures kit to build with my 10-year-old son and couldn't be happier with the outcome!


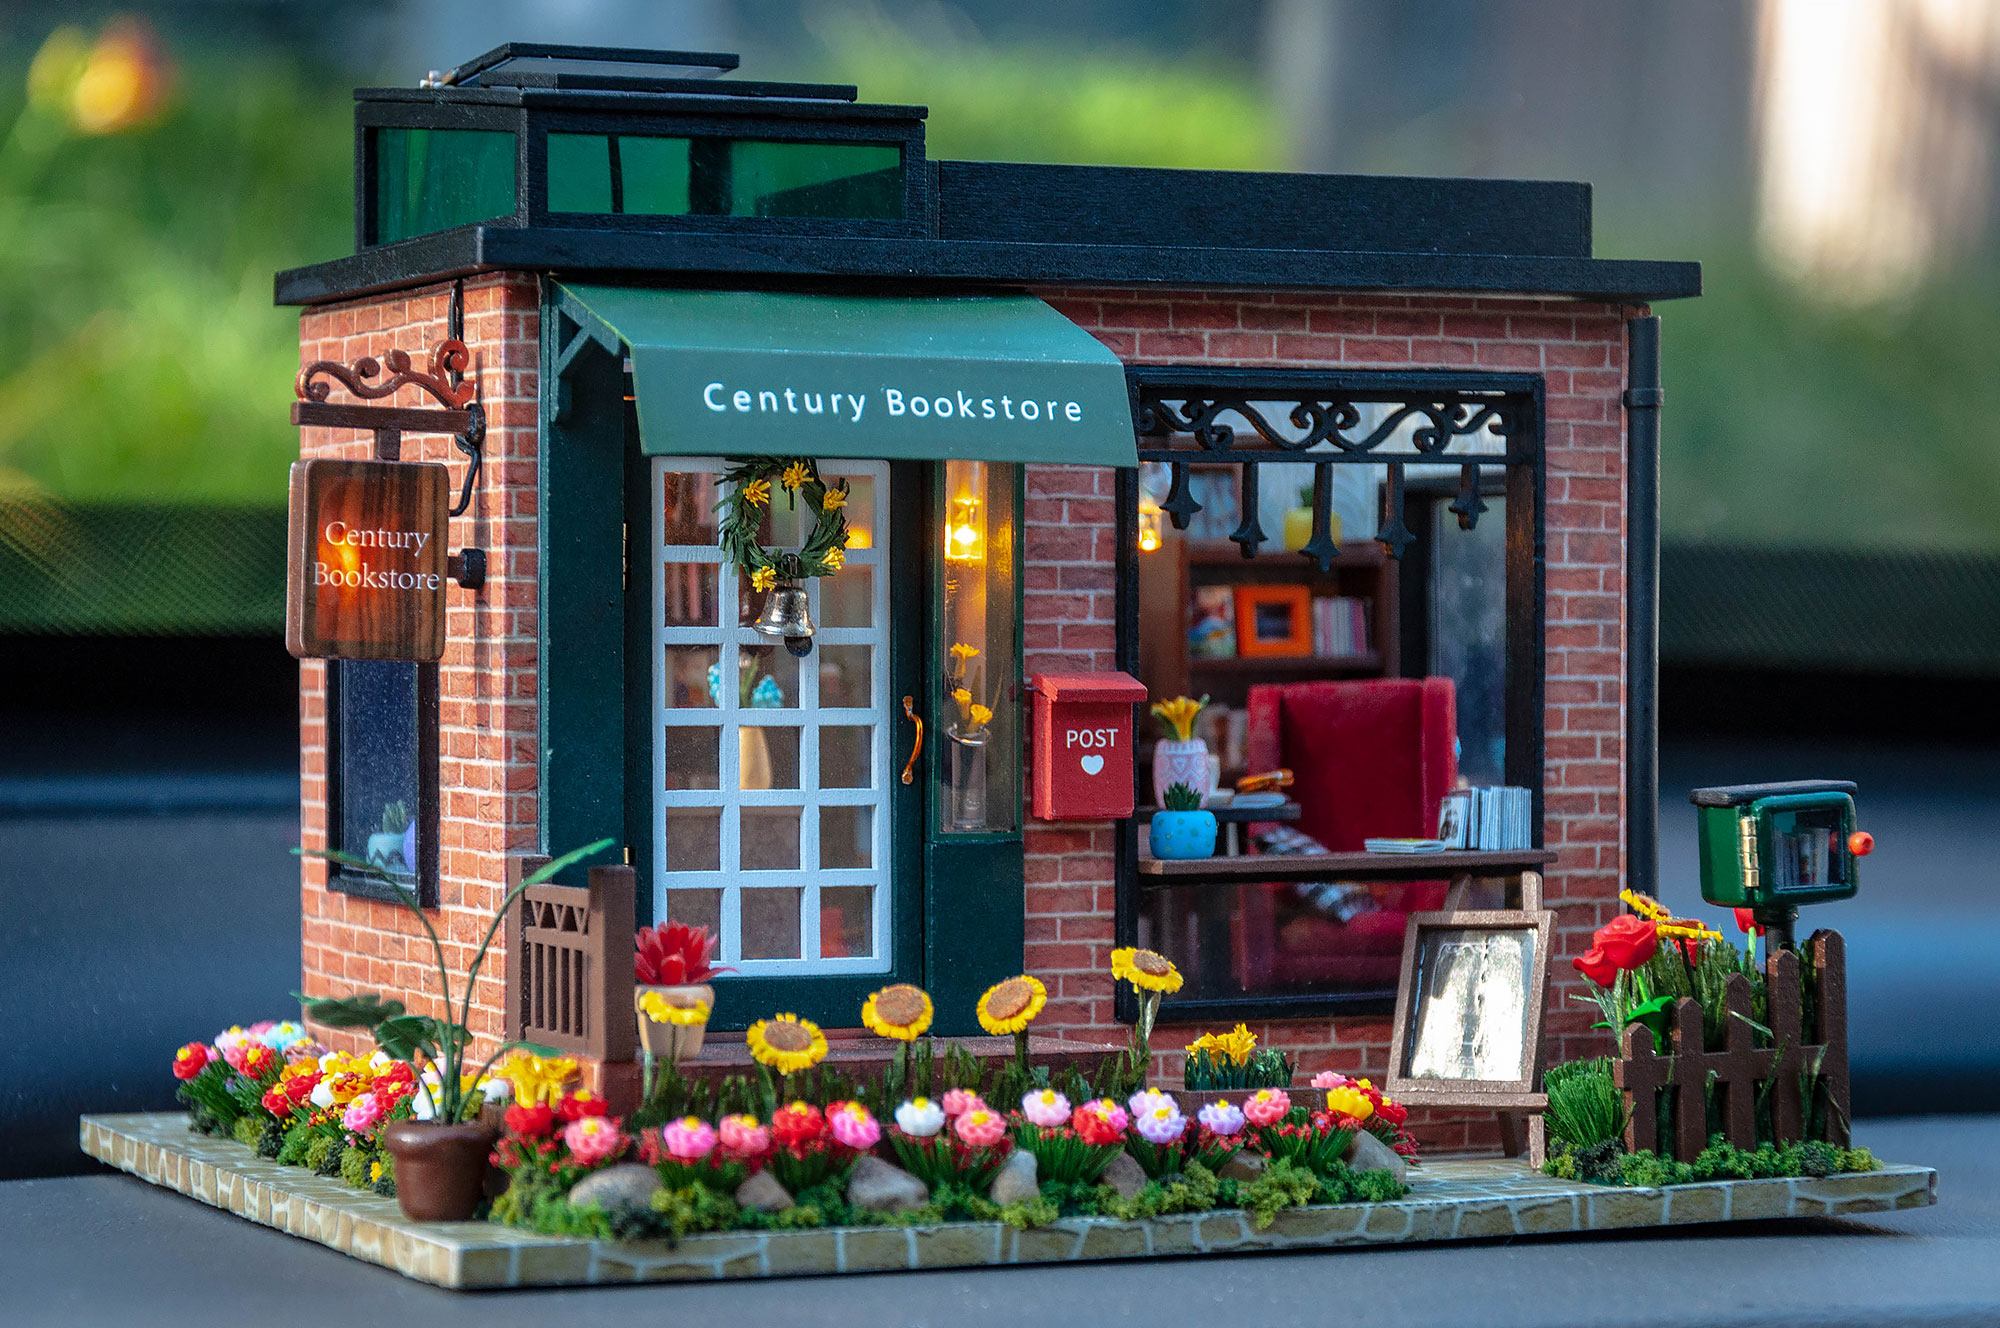
General customizations
- More vegetation.
- Interior layout rearranged.
- Changed mailbox positioning.
- Added mini bookhouse.
- Added rain pipes.
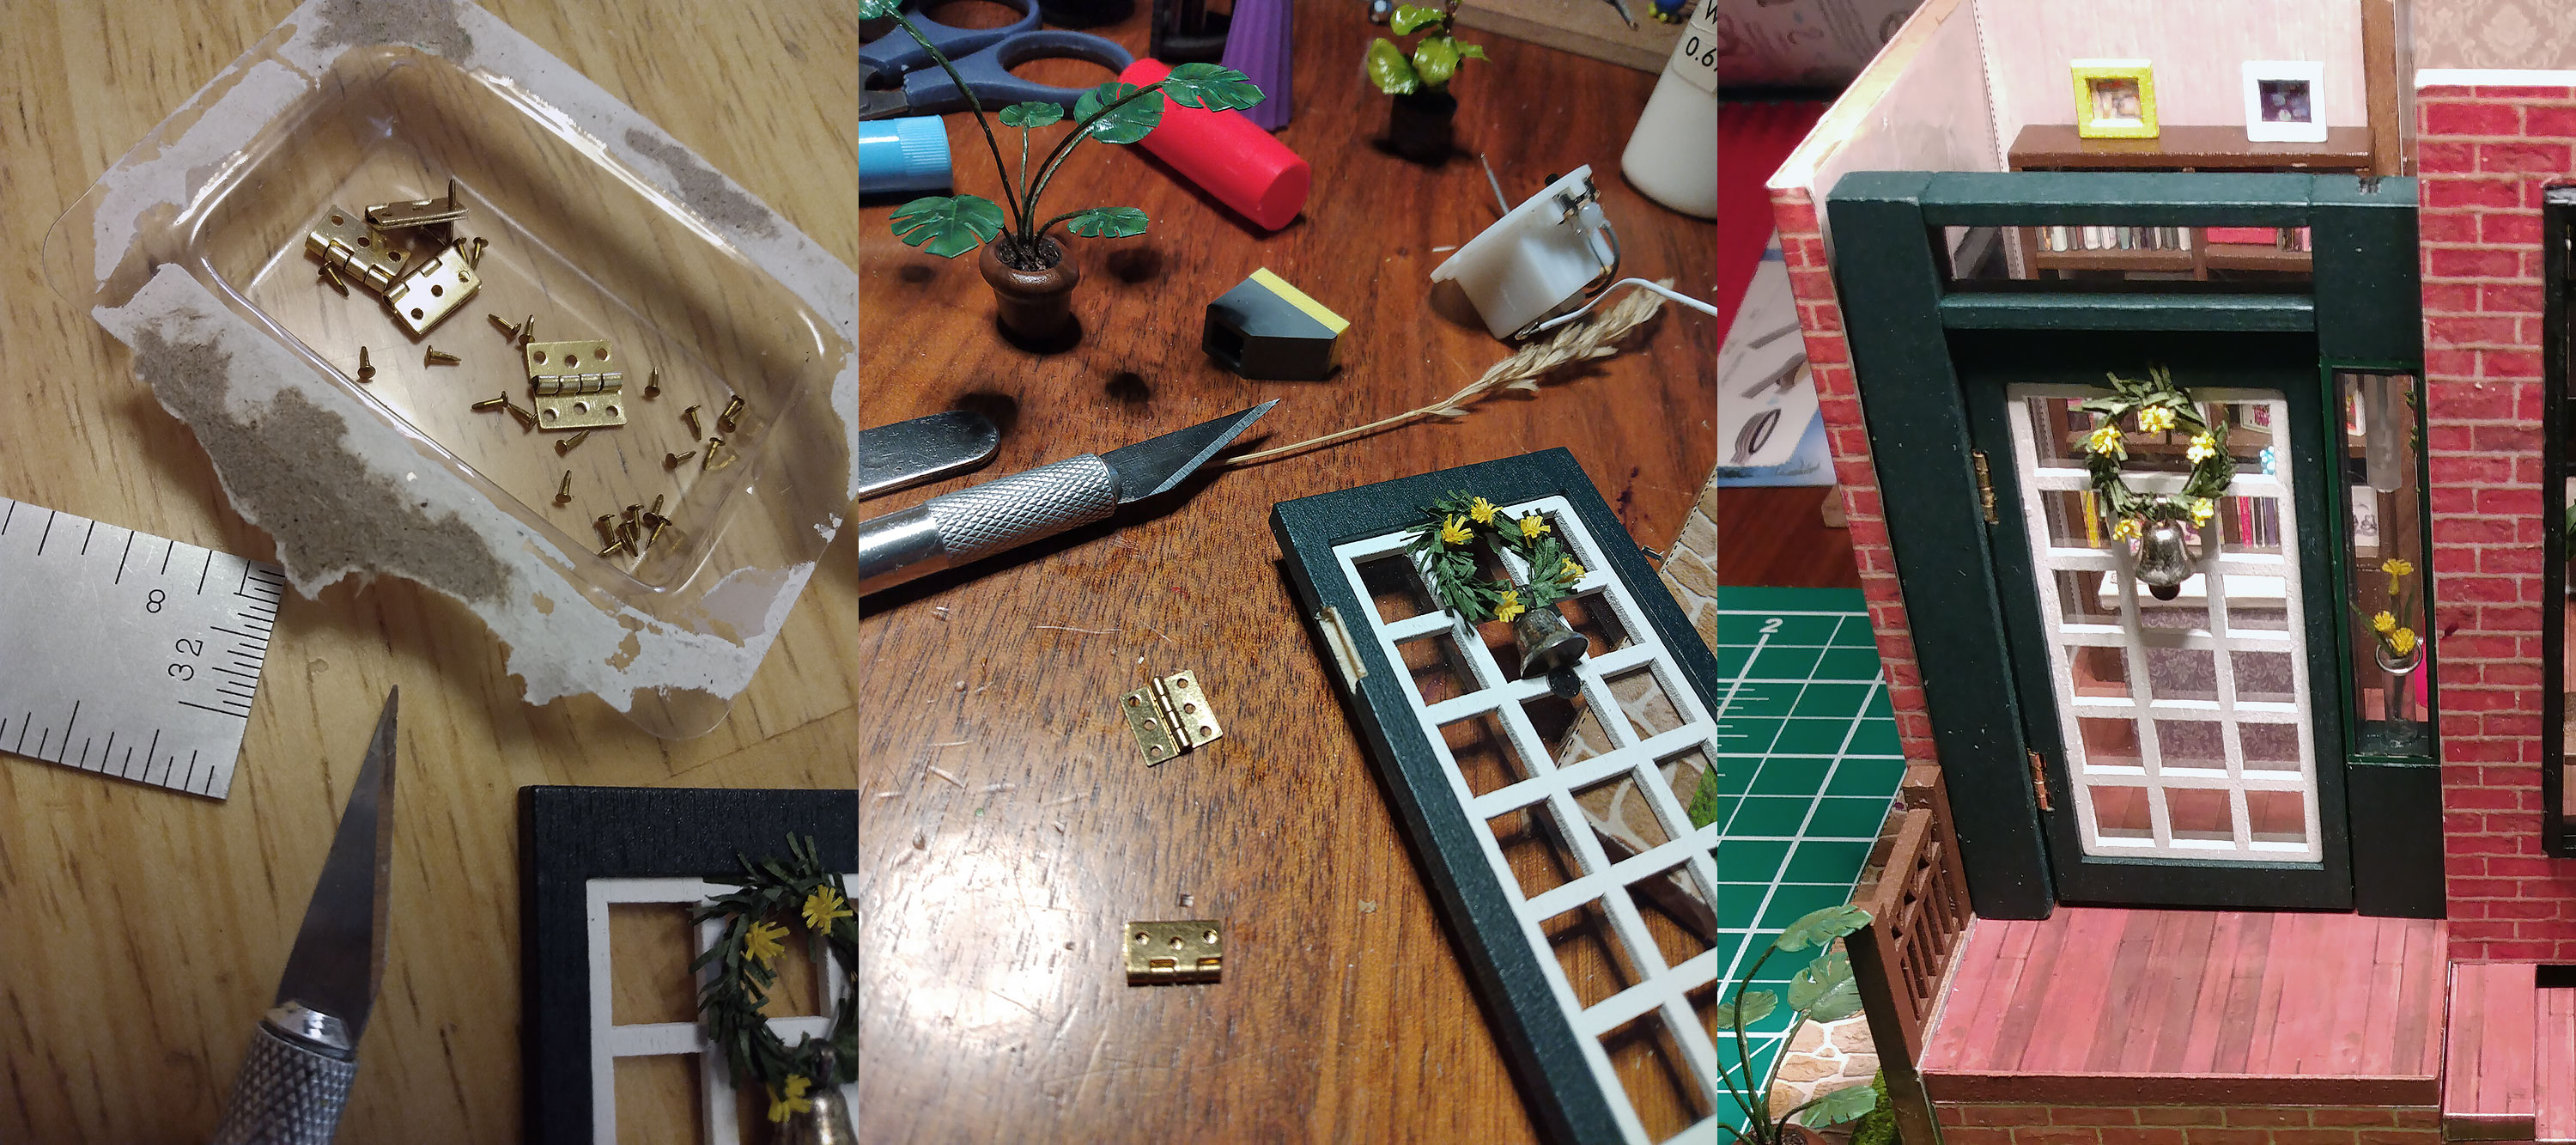
Hinges
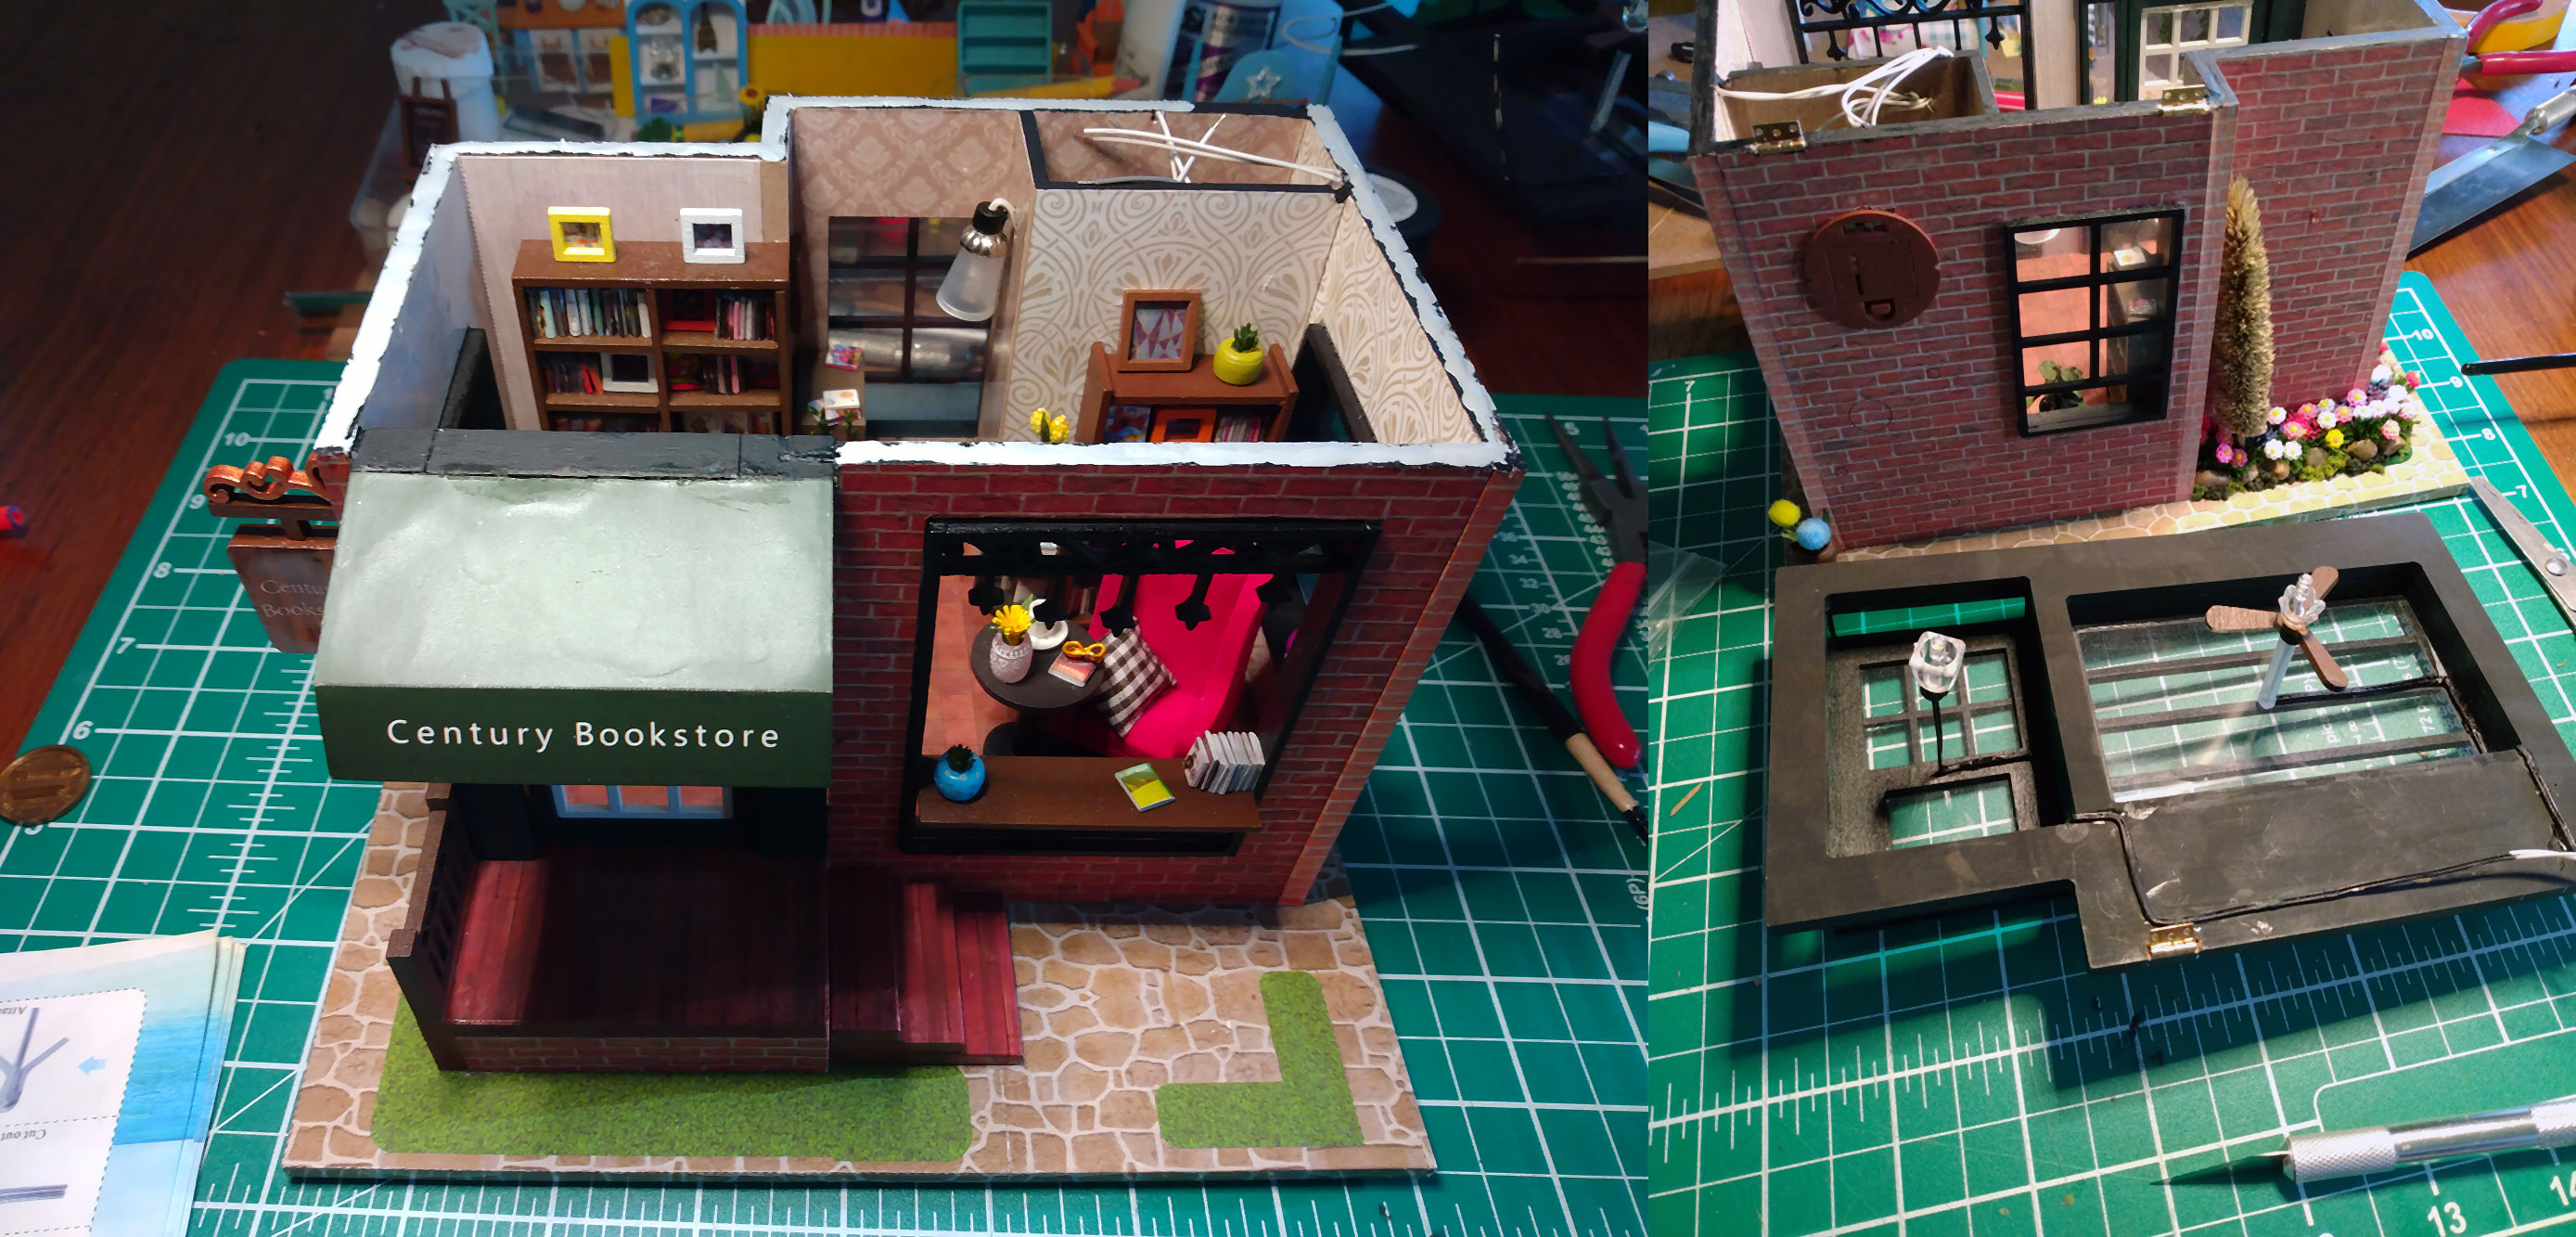
Being Sklyars, we had to turn things up a few notches. Initially I was going to build hinges from scratch, but accidentally discovered at Hobby Lobby that Mayberry Street Miniatures produces hinges for their other (larger) kits, that actually ended up working perfectly for us, and quite to scale, too! As a result we literally made everything openable.
- Added hinges to main door. This one ended up being a little tricky because previously the main supporting column was to be on the right side of the door, while the display case with vase on the left. Because the only way for the door to open was outwards while being hinged on the left, the display case wall thickness couldn't support hinges being embedded into it. As a result, the column and display case were swapped sides. Ultimately I feel this is not only an improvement in the structural department, but also in visual, as the entrance feels more balanced now.
- Hinged mailbox! (The most fun thing to play with in this set!)
- Added a micro bookhouse (that are very popular around where we live in California) with a hinged, magnetic door.
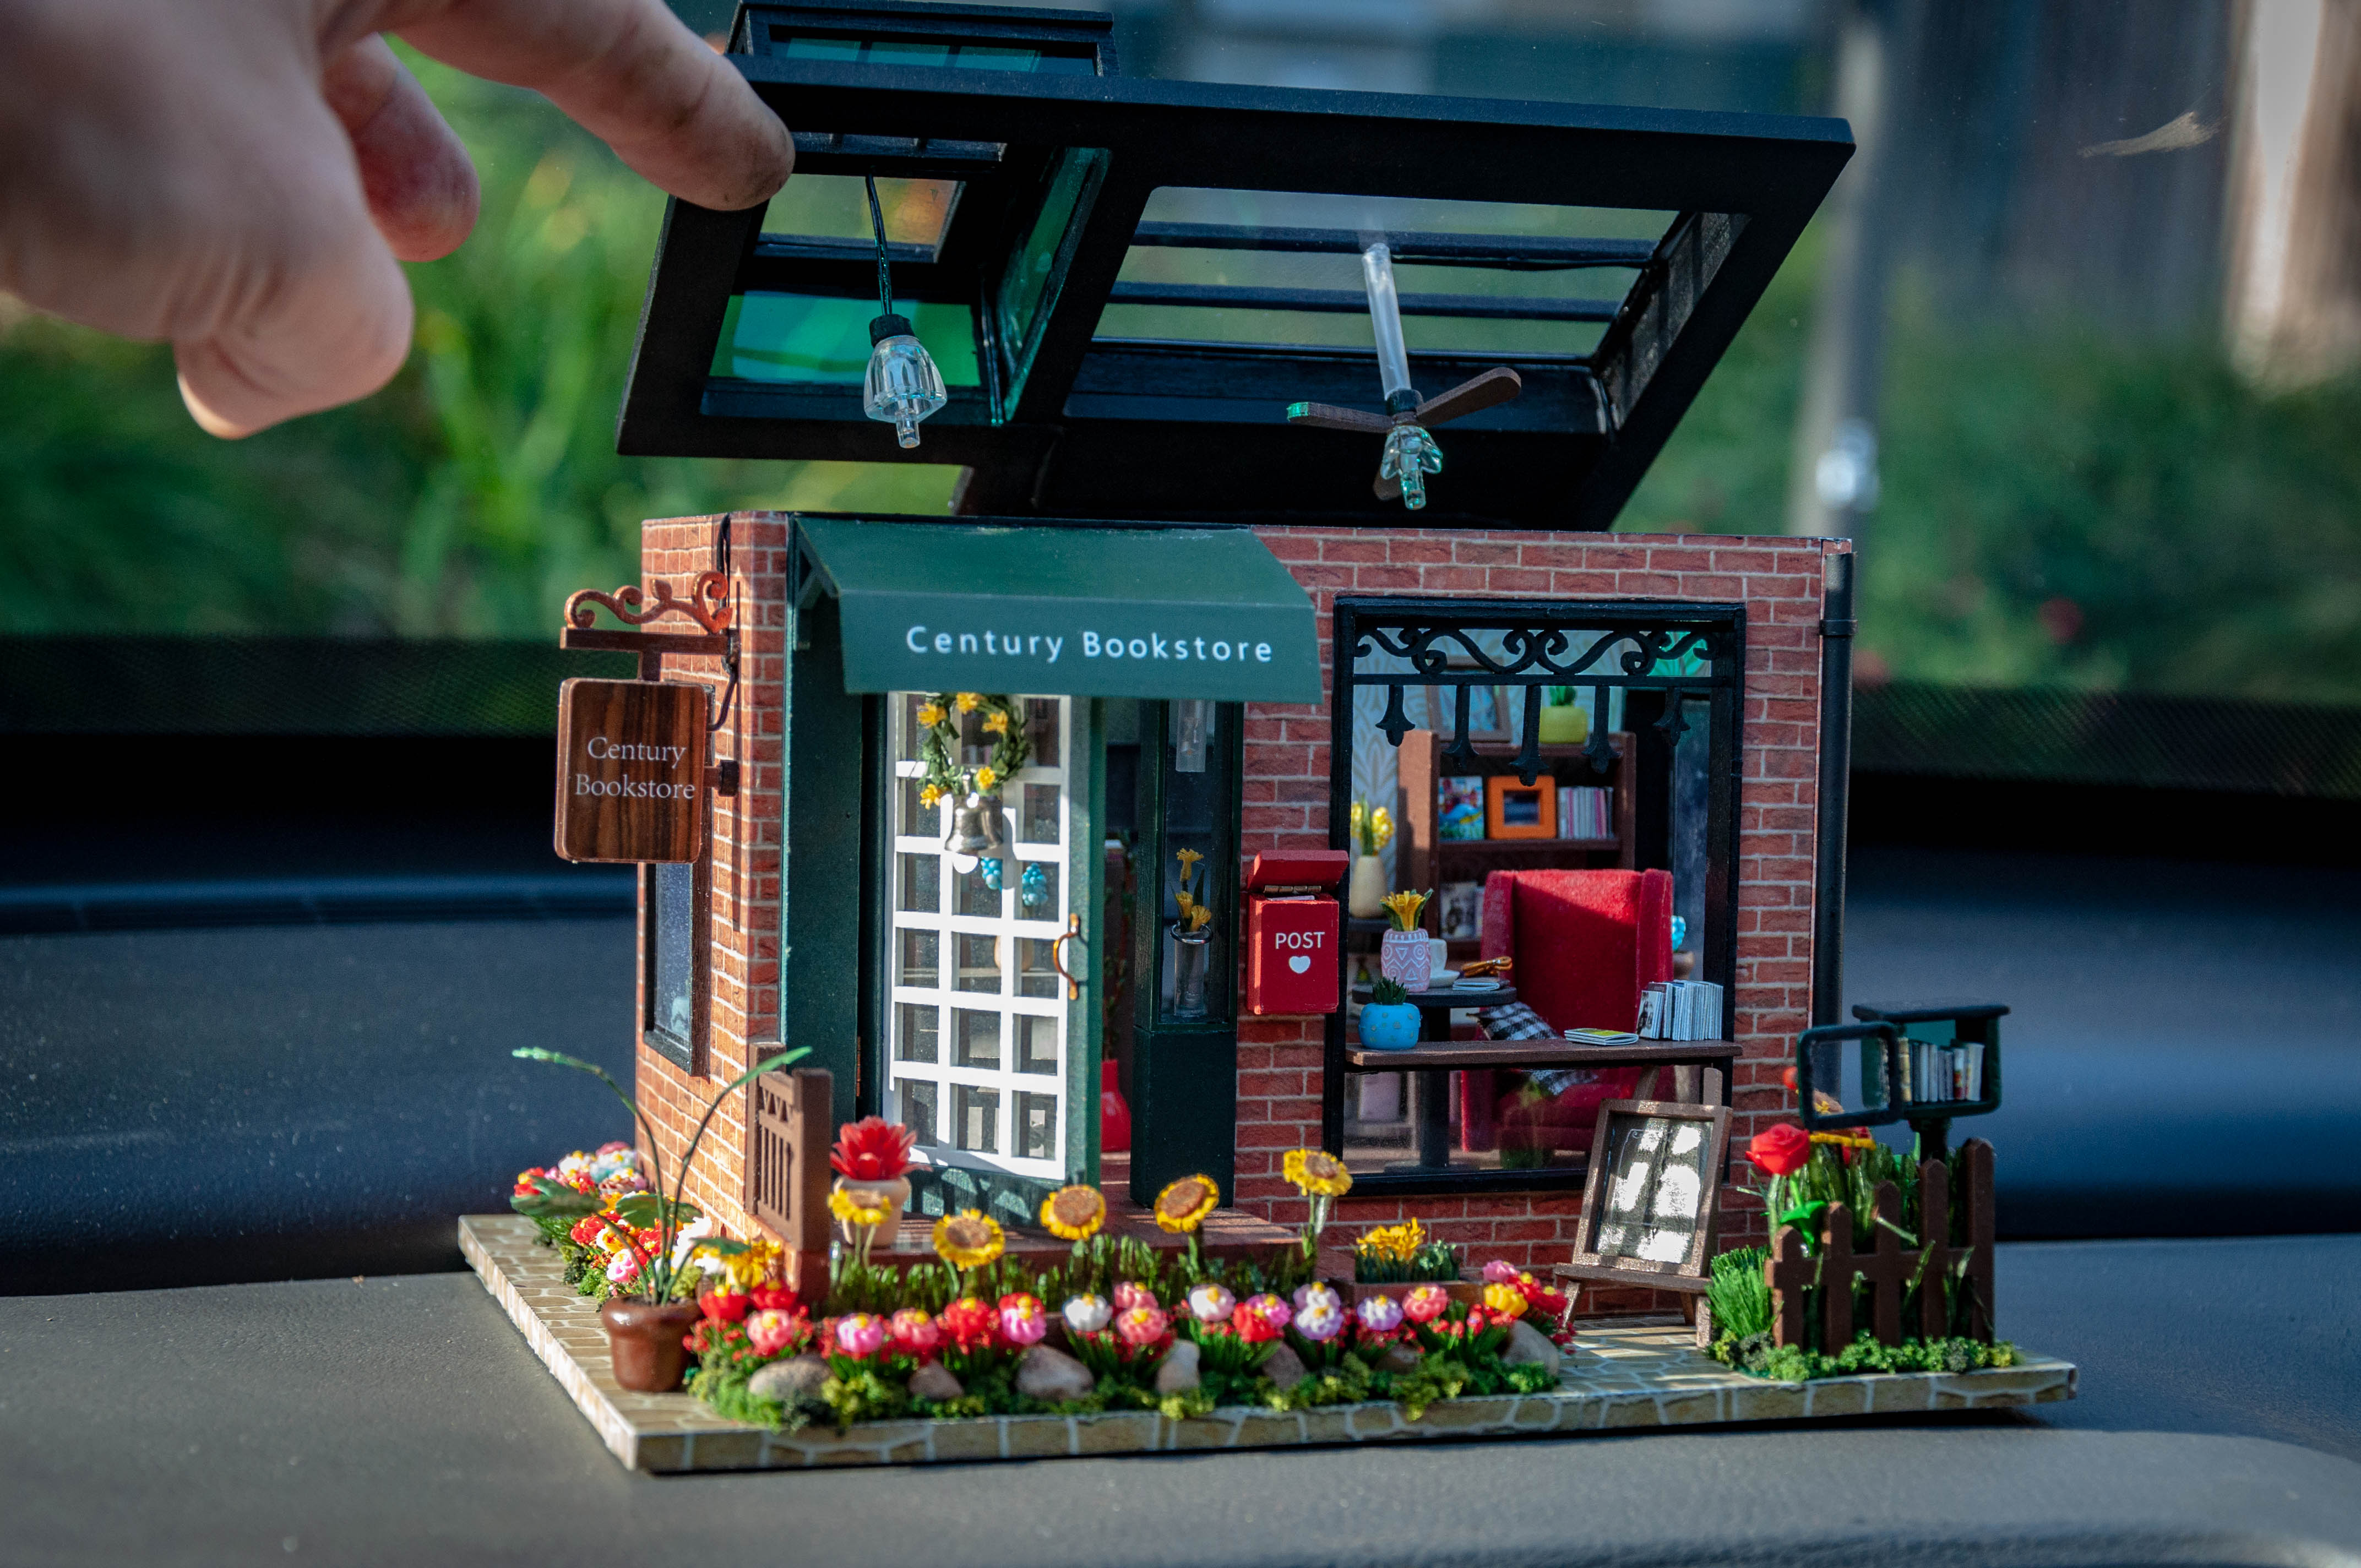
- Openable, hinged roof featuring a magnetic lock for easy access to interior.
Wiring/Electrical
To my surprise, this kit includes 5 lights! Create tidy wiring throughout by pre-bending wires using pliers and super gluing together to keep bends in-place. Be sure to test fit all the beds several times prior to gluing [using CA glue and accelerator].
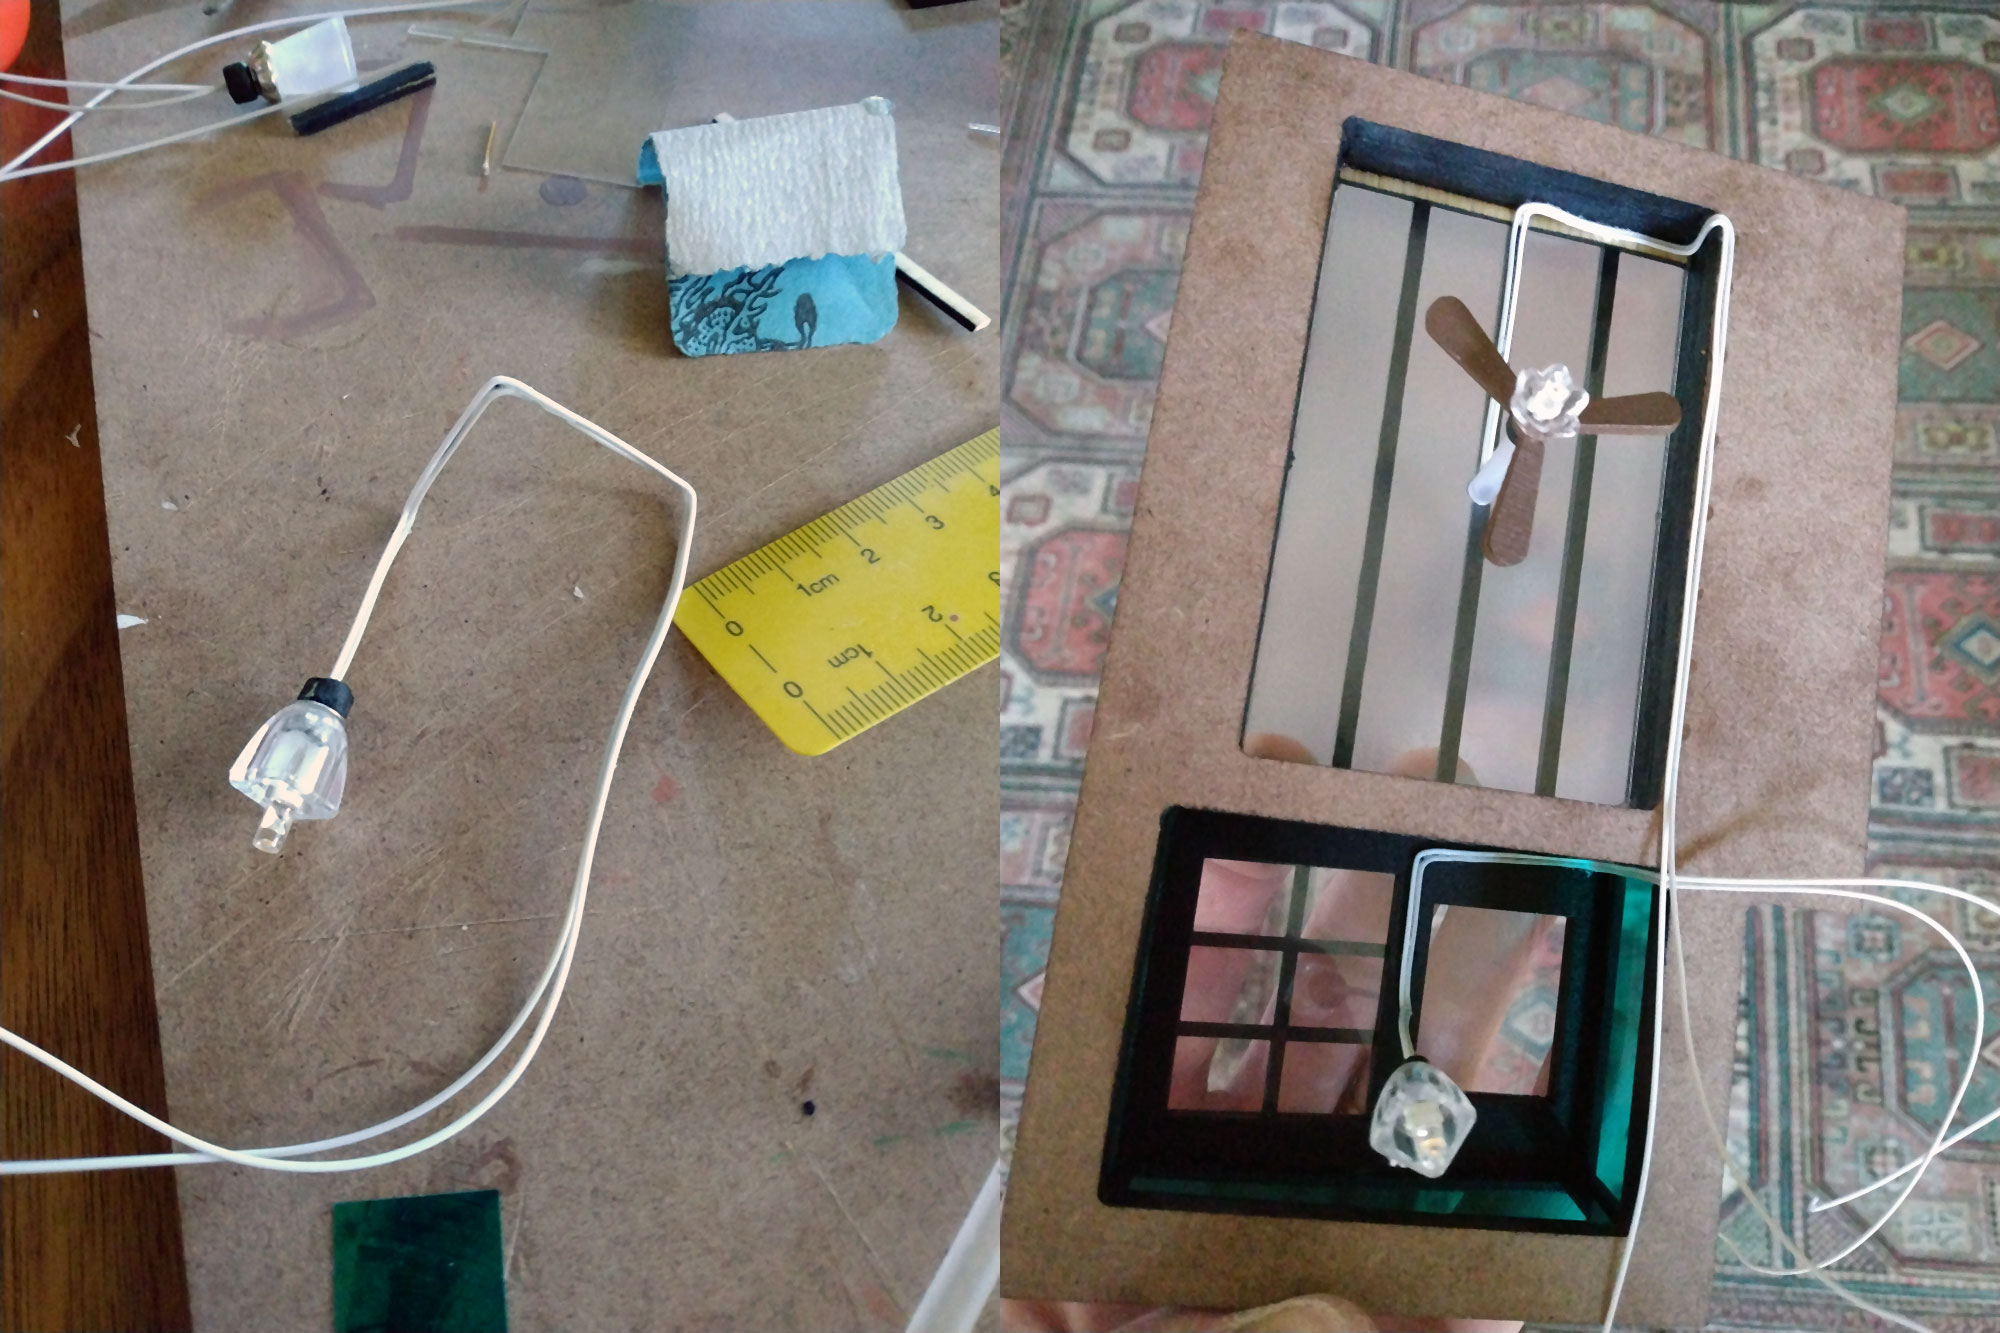
All the wiring going to the sign and door was hidden inside of walls. Use a Dremel with a rotating disc to carve out a groove deep enough to fit both wires and glue them in-place. Fill the groove with putty and sand it; repeat process several times until you've reached a completely smooth edge. Cover edges with black paint.
In order to properly sit the module, the wall opening needed to be enlarged. While at it, the white battery holder in the back was painted brown to match the brick wall.
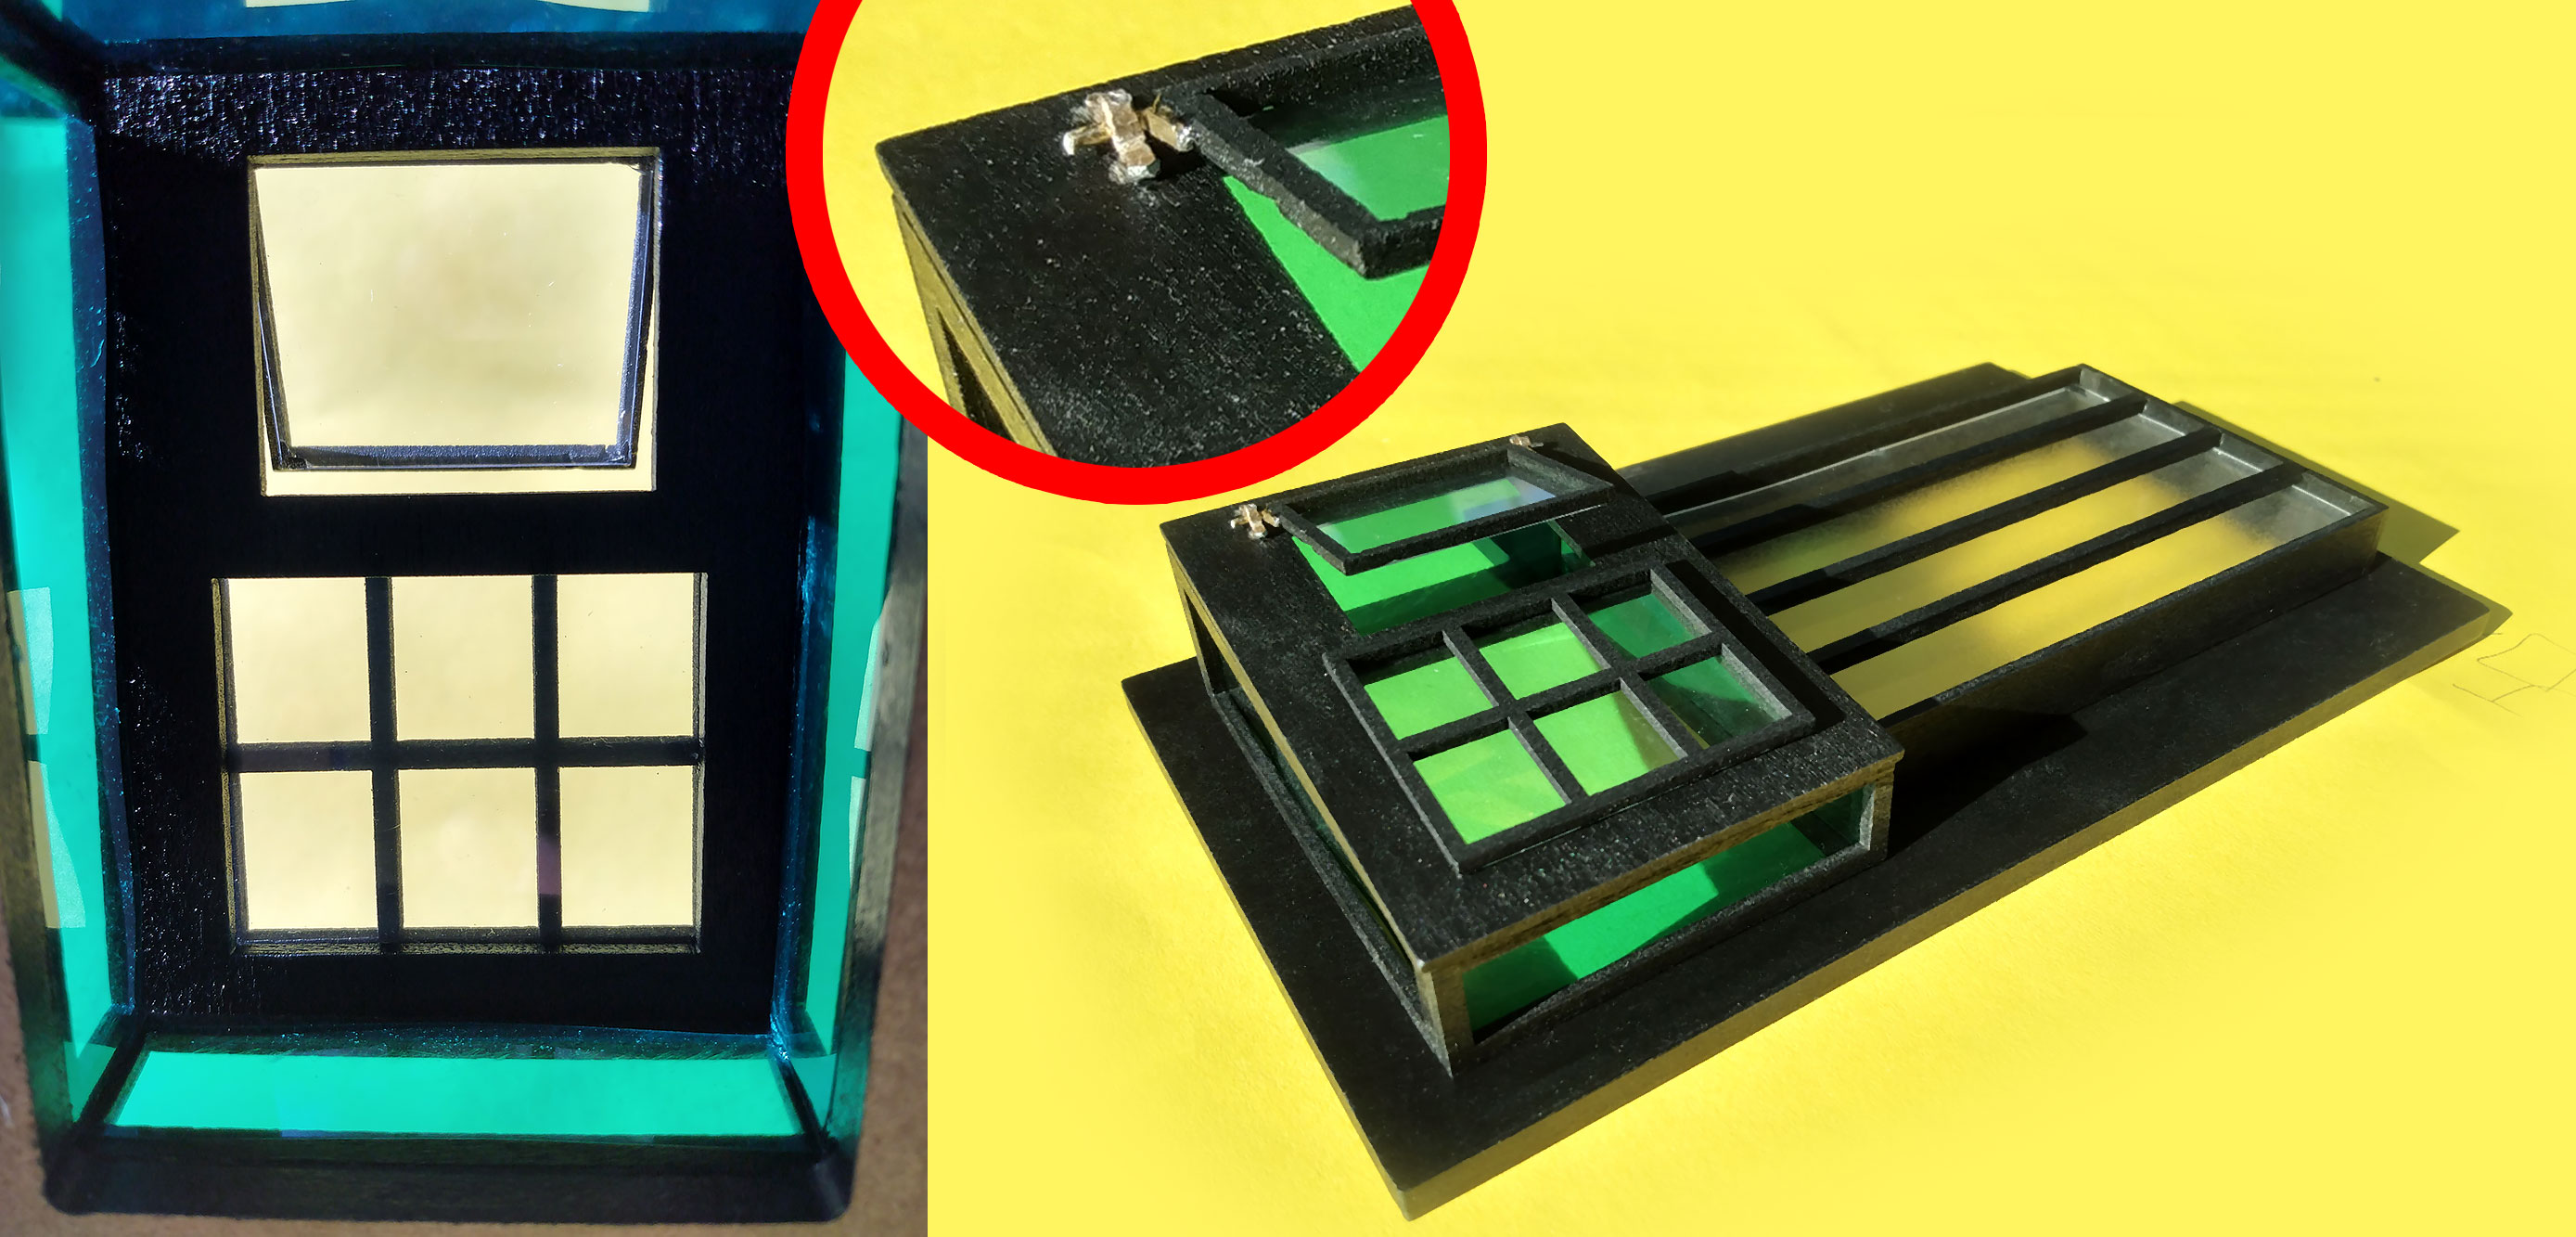
Glass
One of the best upgrades you can do to this kit is add glass to all the windows. This will greatly reduce dust getting inside while making it more life-like.
We started with the roof, where green-blue glass was added to create a pleasant green interior tint during sunny days, tying in nicely to deep green accents of the store like the entryway.
Grass
Make details such a grass more realistic by spending more time on the cutting process.
- Ensure no grass end is cut off at a 90 degree angle, like the photo on the box of the kit suggests.
- Make grass uneven height.
- Ensure that not all the grass is sticking straight up, by incorporating smooth bends mixed in with abrupt folds that make the grass stick out past the fence.
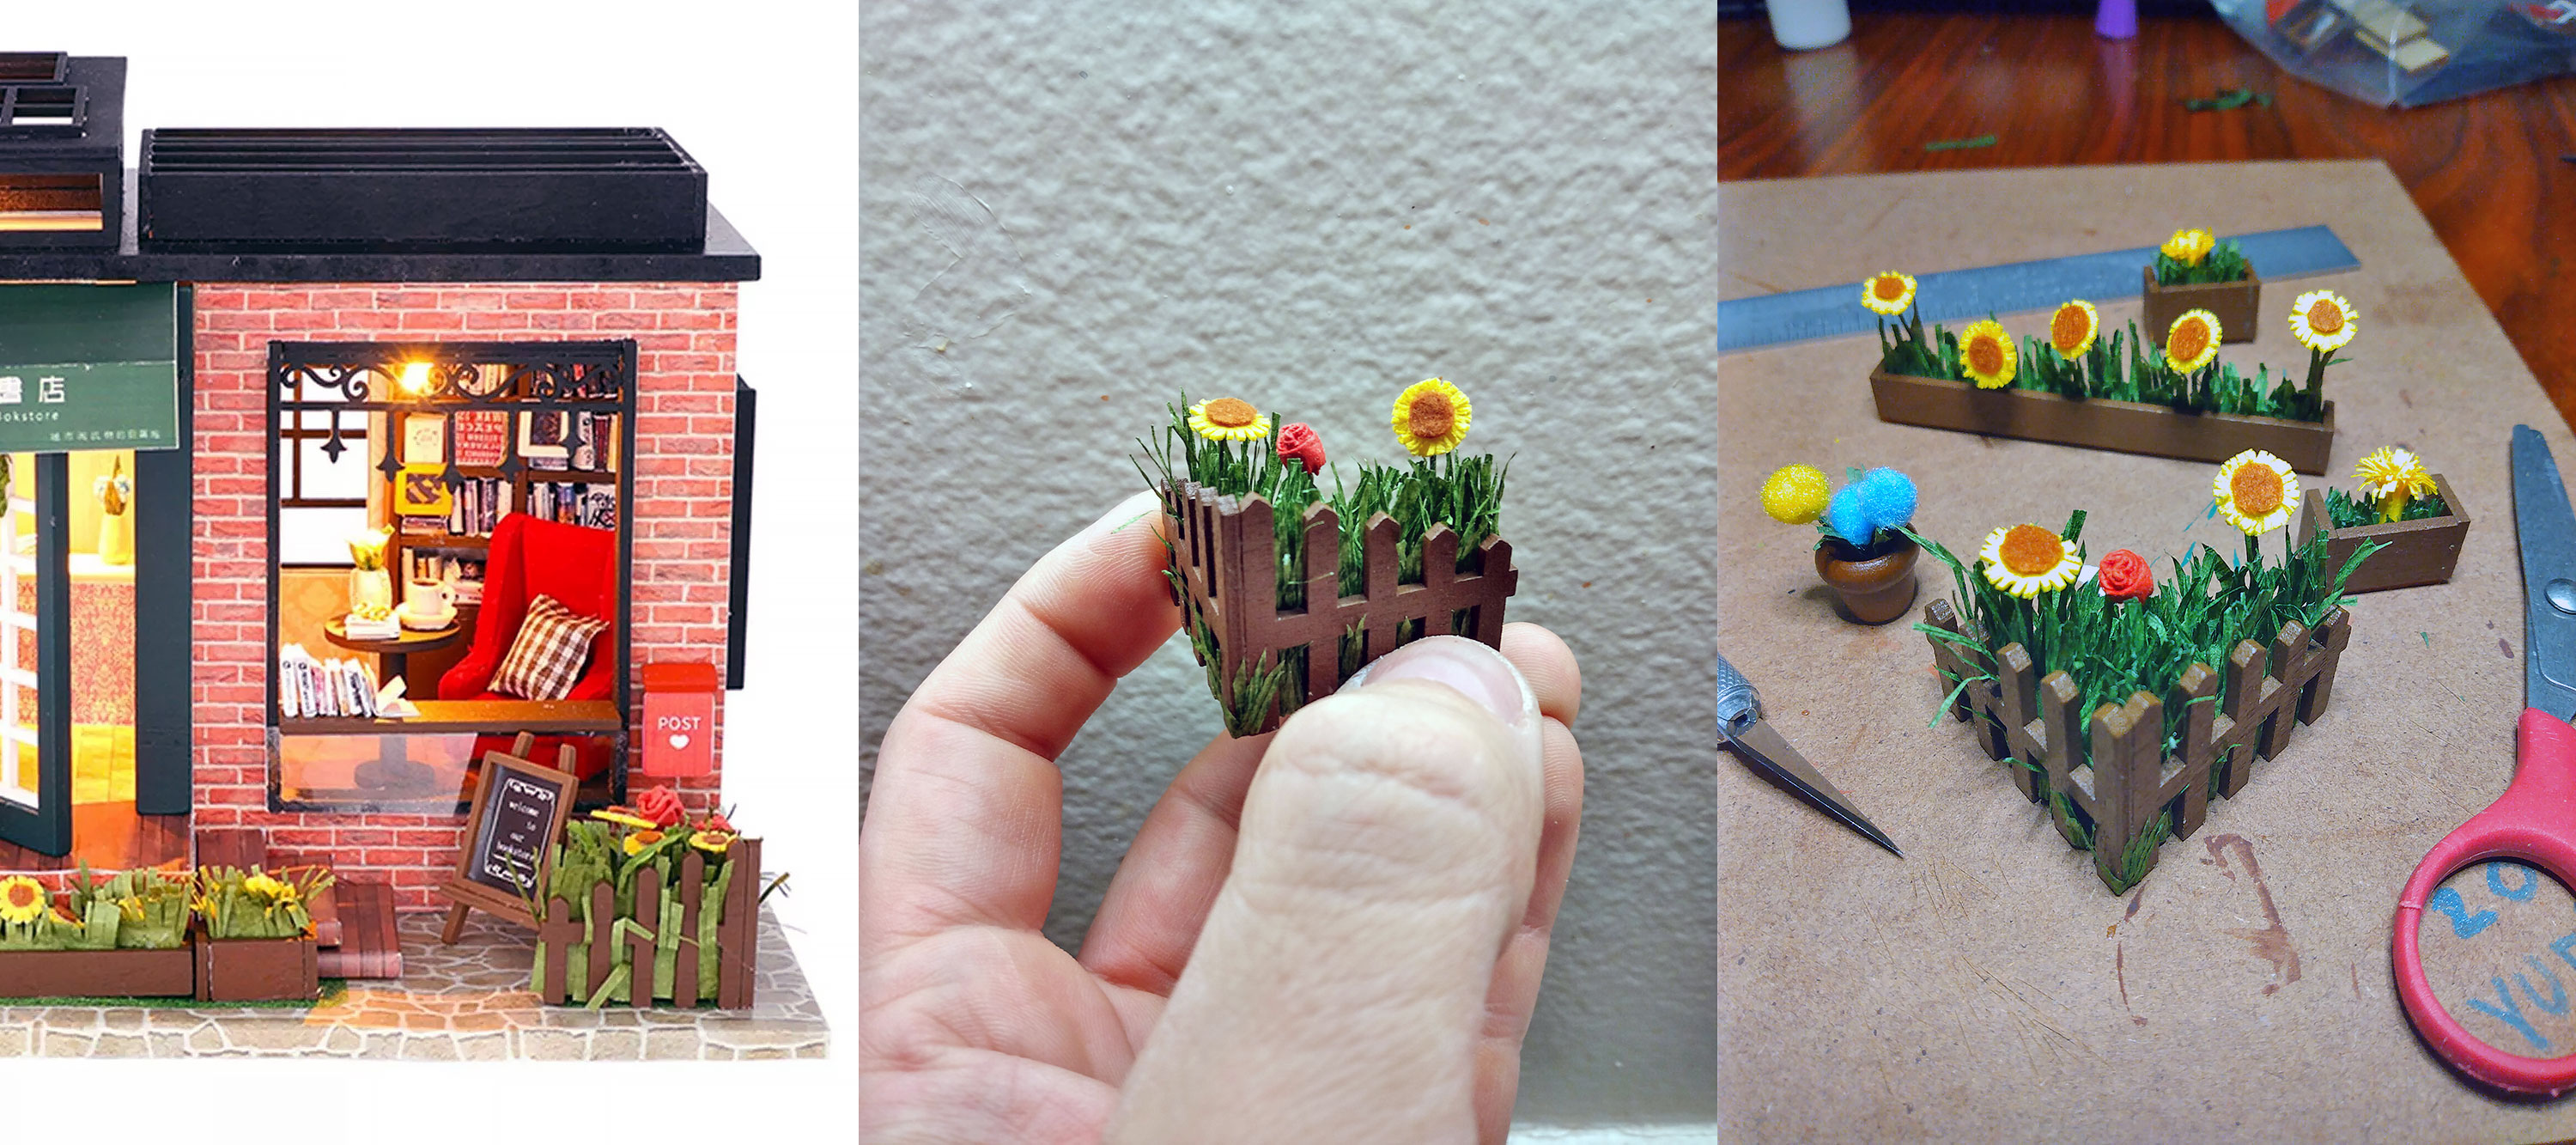
Being plant lovers, we added plants where we could! A lot of them came from our local hikes around Bay area peaks and parks. Some of the others came from Hobby Lobby and Michaels.

Books
This kit has lot of books, so figuring out a quick way to build them was essential.
Manual suggested that we glue picture frames to the front of the shelve, which we found strange, so we placed them onto shelves, next to books.
Our bookstore is more organized so you won't find too many books out of place.
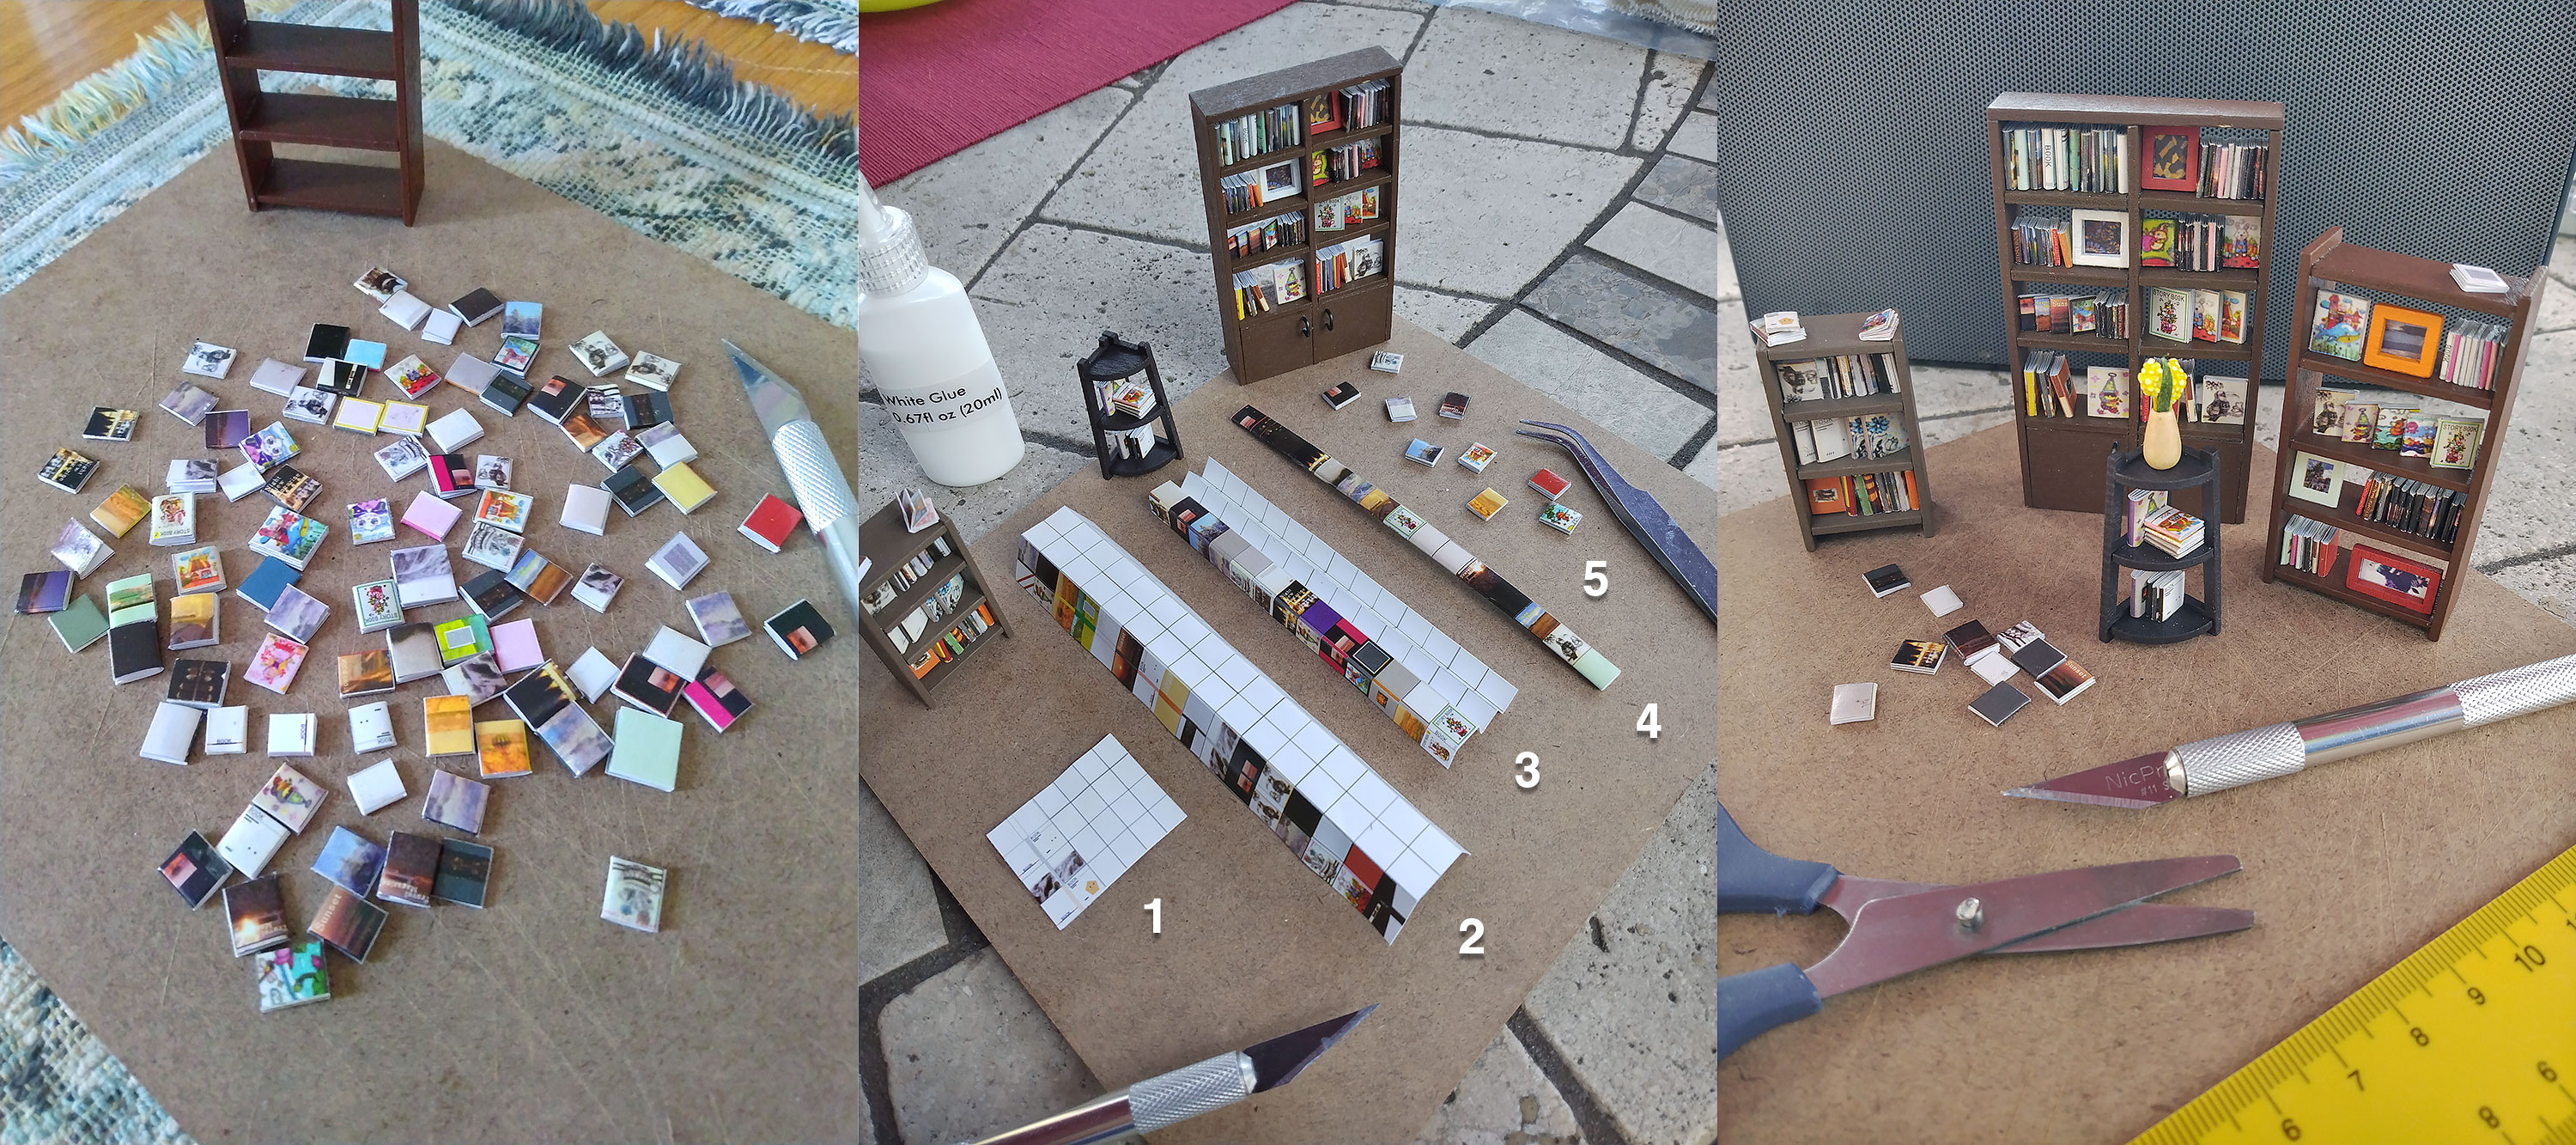
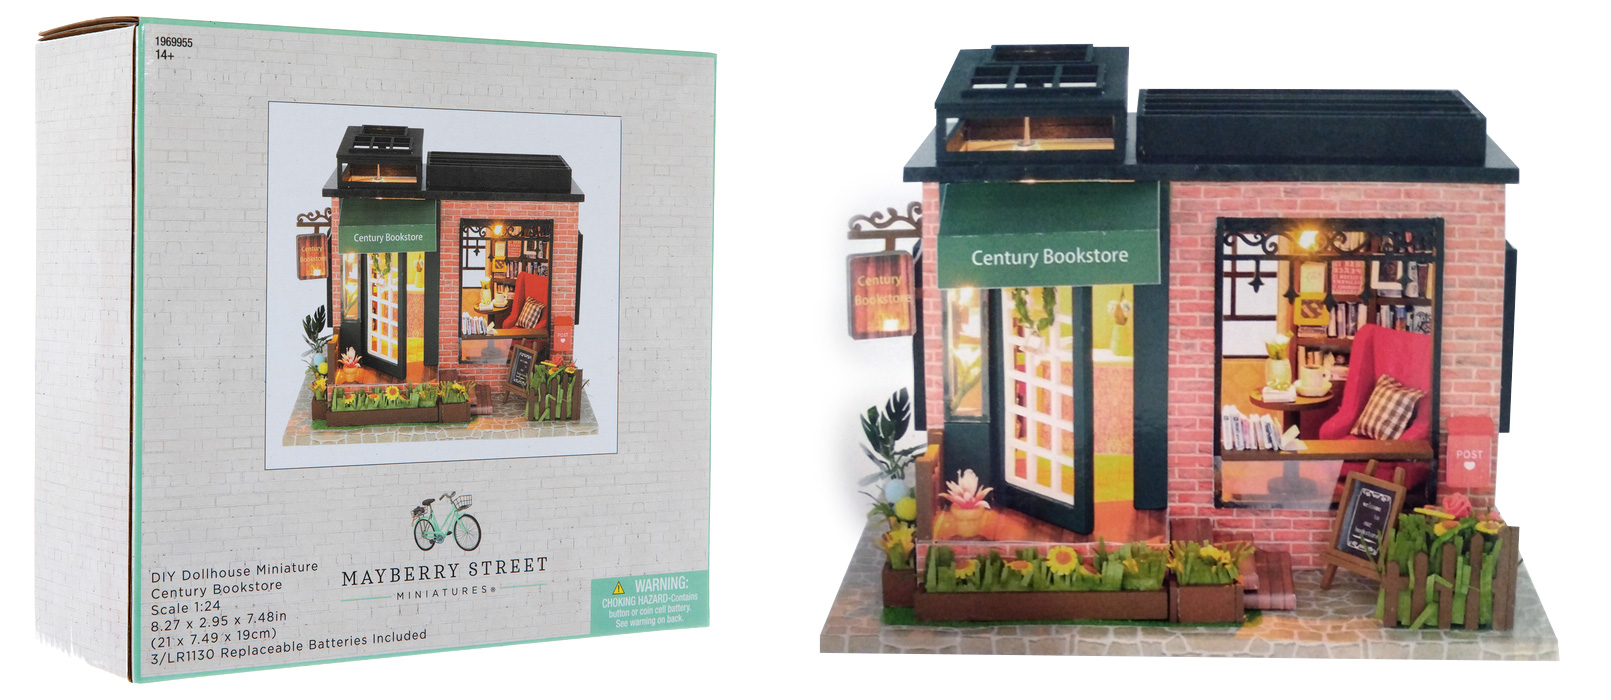
Above: suggested build.
Enjoyed what you saw? Stay updated by following me.